DIY RV ceiling is the self-initiated renovation of a recreational vehicle’s overhead interior. It involves personal modifications, such as insulation or paneling, done by the owner.
Transform your camper into a personalized haven with our DIY RV Ceiling Ideas. Explore creative and practical solutions to update your space, making it uniquely yours, with innovative DIY techniques for a revamped and cozy atmosphere.
Discover easy and creative DIY RV ceiling ideas to give your camper a fresh update. From simple tweaks to innovative designs, personalize your space with cost-effective solutions. Elevate your camping experience by implementing these DIY ideas for a more comfortable and stylish camper interior.
DIY RV Ceiling Ideas to Update Your Camper
Elevate your RV interior with DIY ceiling updates. Transform your camper into a cozy haven on wheels by considering creative and budget-friendly ideas for the often-overlooked ceiling space.
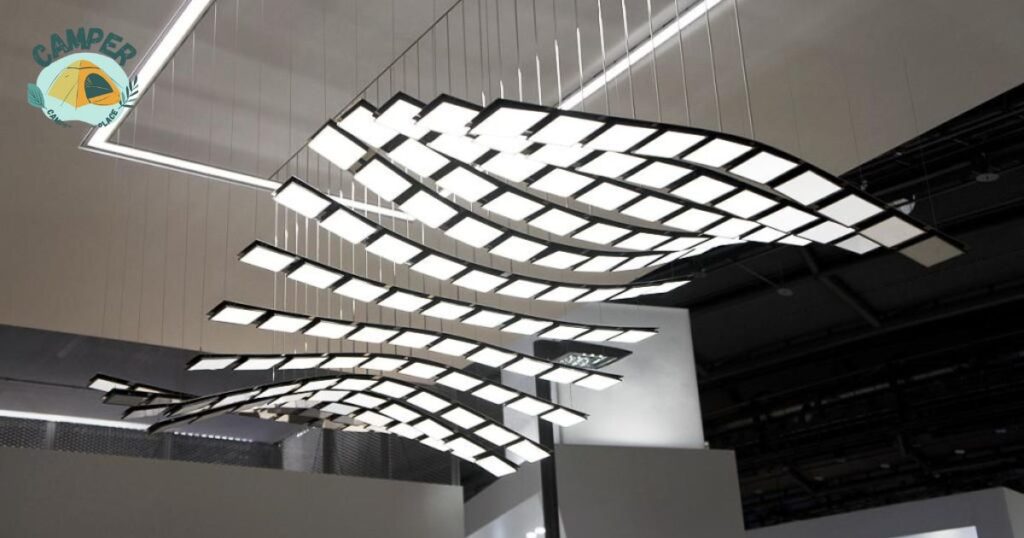
Experiment with peel-and-stick wallpapers or lightweight fabric panels to add a touch of personality. LED strip lights are a simple yet effective way to brighten up your RV’s overhead space, creating a warm and inviting atmosphere for your adventures.
Don’t forget the power of paint! A fresh coat can make a huge difference. Choose light colors to give the illusion of more space or go bold for a unique look. With these DIY RV ceiling ideas, you can turn your mobile home into a stylish retreat that reflects your style.
Lightweight Ceiling Ideas for RV
Upgrade your RV’s interior with lightweight ceiling ideas that add style without adding excess weight.
Consider installing lightweight materials like PVC panels or foam tiles to give your RV a modern and refreshed look.
These materials are easy to handle and won’t strain your RV’s structure, making them perfect for a hassle-free ceiling makeover.
Opt for LED strip lights to brighten up your RV ceiling while keeping it lightweight. LED lights are energy-efficient, produce minimal heat, and come in various colors to create the perfect ambiance for your space.
Attach the strips to the ceiling easily, and enjoy a well-lit, lightweight solution that enhances the overall atmosphere inside your RV.
Embrace the versatility of fabric ceiling panels for a soft and cozy touch. Fabric panels are not only lightweight but also absorb sound, improving the acoustics inside your RV.
Choose from a variety of colors and patterns to match your style, creating a personalized and comfortable haven on the road.
These simple and lightweight ceiling ideas will transform your RV into a stylish and functional home away from home.
PVC Tin Ceiling Tiles
PVC tin ceiling tiles offer a lightweight and durable alternative to traditional metal tiles. These tiles mimic the classic look of tin, providing a stylish and decorative touch to any space without the added weight.
Easy to install, PVC tin ceiling tiles come in various patterns and finishes, allowing you to customize the look of your ceilings effortlessly. The lightweight nature of PVC tin tiles makes them an ideal choice for RV interiors.
They won’t strain your RV’s structure while still delivering an elegant aesthetic. Additionally, PVC tiles are moisture-resistant, making them suitable for use in various climates.
Upgrade your RV’s ceiling with the charm of the tin without compromising on weight or convenience by opting for PVC tin ceiling tiles.
Foam Planks RV Ceiling Idea Styrofoam Ceiling Tiles
Transform your RV’s ceiling with the lightweight and easy-to-install option of foam planks or Styrofoam ceiling tiles.
These materials are not only stylish but also incredibly lightweight, making them perfect for enhancing your RV’s interior without overburdening its structure.
Foam planks offer a modern and sleek appearance, creating a clean and inviting atmosphere inside your mobile home.
Styrofoam ceiling tiles are another excellent choice for RV interiors. They are exceptionally light, making them easy to handle during installation.
Styrofoam tiles also provide insulation, helping to regulate the temperature inside your RV. With various designs available, you can choose tiles that complement your RV’s aesthetic while enjoying the benefits of a lightweight and practical ceiling solution.
Upgrade your RV’s living space effortlessly by opting for foam planks or Styrofoam ceiling tiles. These materials not only add a touch of elegance but also contribute to a comfortable and well-insulated environment, making your RV feel like a true home on the road.
RV Renovation with Ceiling Tiles
Revitalize your RV’s interior with a stunning renovation using ceiling tiles. Lightweight and easy to install, ceiling tiles can completely transform the look of your mobile home.
Opt for materials like PVC, foam, or Styrofoam tiles for a hassle-free renovation that won’t add unnecessary weight to your RV.
Choose from a variety of designs, patterns, and colors to match your style preferences. Whether you prefer a classic and elegant aesthetic or a modern and sleek vibe, ceiling tiles offer versatility to suit any taste.
The renovation process is straightforward, allowing you to achieve a refreshed and personalized look for your RV’s interior without the need for extensive construction.
In addition to enhancing the visual appeal, ceiling tiles can also provide insulation, contributing to a more comfortable and energy-efficient living space.
Elevate your RV experience by investing in a ceiling tile renovation, turning your mobile home into a stylish and cozy haven on wheels.
Wood Ceilings in an RV
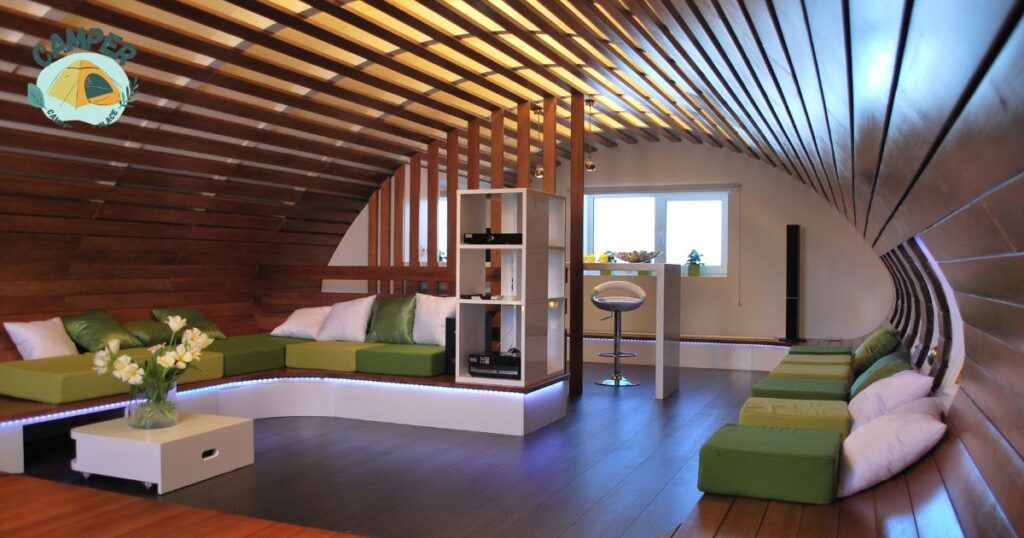
Upgrade your RV’s interior with the warmth and charm of wood ceilings. Wood ceilings add a cozy and natural feel to the living space, creating a welcoming atmosphere on your travels.
Choose lightweight wood materials like cedar or pine to maintain the structural integrity of your RV while enjoying the timeless beauty of wood.
Installing wood ceilings in your RV is a straightforward and rewarding DIY project. You can easily cover the existing ceiling with tongue-and-groove planks or panels, giving it a rustic or contemporary look, depending on your preference.
The simplicity of wood installation allows you to customize your RV’s interior without the need for extensive renovations.
Wood ceilings not only enhance the aesthetics but also contribute to better insulation in your RV. Wood has natural insulating properties, helping regulate temperature and reduce energy costs.
Elevate your on-the-road experience by bringing the elegance of wood into your RV, creating a stylish and comfortable retreat for your adventures.
Wood Plank RV Ceiling DIY
Transform your RV’s interior with a DIY wood plank ceiling project. Begin by choosing lightweight wood planks, such as cedar or pine, to maintain the RV’s balance.
This simple and cost-effective DIY project adds a touch of rustic charm or modern elegance to your mobile home.
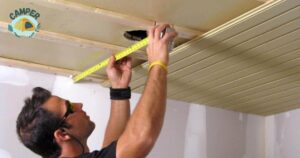
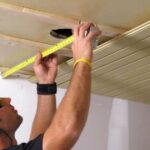
Start by measuring and cutting the wood planks to fit the ceiling space. Use tongue-and-groove planks for easy installation, ensuring a seamless and polished look.
Attach the planks directly to the existing ceiling, creating a cozy and inviting atmosphere inside your RV. With a bit of creativity and effort. Your DIY wood plank RV ceiling will become a personalized and stylish focal point for your on-the-go adventures.
Cottage Style RV Ceiling
Transform your RV into a charming haven with a cottage-style ceiling makeover. Opt for lightweight beadboard or shiplap panels to create a cozy and inviting atmosphere reminiscent of a quaint cottage.
These materials are not only aesthetically pleasing but also easy to install, making them perfect for a DIY project. Choose a soft and neutral color palette for the ceiling to evoke a serene cottage ambiance.
Consider adding decorative beams or molding for an extra touch of rustic charm. Cottage-style ceilings often feature exposed wood elements, contributing to a warm and welcoming interior.
Embrace simplicity and comfort with a cottage-style RV ceiling that brings the coziness of a countryside retreat to your mobile home on the road.
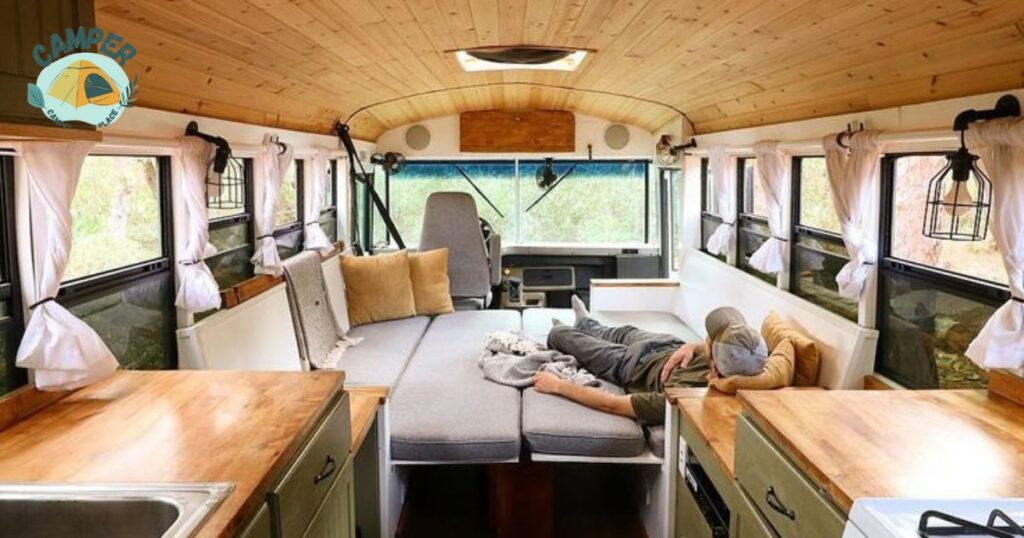
Cedar Wood Plank Ceiling in Van Conversion
Elevate your van conversion interior with the natural beauty of a cedar wood plank ceiling. Cedar not only adds a touch of rustic elegance but also infuses a pleasant aroma into your mobile space.
Opt for lightweight cedar planks to enhance the aesthetics without compromising the van’s structural integrity. Embark on a DIY adventure by measuring and cutting cedar planks to fit the ceiling space of your van.
Use tongue-and-groove planks for a seamless and secure installation. The warm tones and distinct grain of cedar create a cozy atmosphere, turning your van into a comfortable retreat on the road.
With its lightweight nature and distinctive charm, a cedar wood plank ceiling is a stylish choice for van conversions, bringing the outdoors inside while you travel.
Ceiling Update with Furring Strips
Revitalize your ceiling with a budget-friendly update using furring strips. Furring strips, often made of lightweight materials like pine, are an excellent choice for a DIY project to give your space a fresh and modern look.
Start by attaching the strips perpendicular to the existing ceiling, creating a visually appealing grid pattern. Furring strips offer versatility in design, allowing you to create interesting patterns or even install them diagonally for a unique touch.
Their lightweight nature makes them easy to handle and install without adding unnecessary weight to your space. Consider painting or staining the furring strips to match your interior style, giving your ceiling a personalized and polished finish.
With a simple and cost-effective approach, updating your ceiling with furring strips is a great way to breathe new life into your living space.
Wallpaper or Fabric on RV Ceilings
Give your RV’s interior a quick and stylish makeover by considering wallpaper or fabric for the ceilings.
Lightweight and easy to install, wallpaper or fabric can add a pop of color, texture, or pattern to create a personalized and inviting atmosphere.
Choose materials that complement your RV’s overall aesthetic, whether it’s a cozy and rustic vibe or a modern and sleek look.
Applying wallpaper to your RV ceiling is a simple DIY project that can make a big impact. Opt for peel-and-stick wallpaper for easy installation and removal, allowing you to change the look whenever you desire.
Alternatively, fabric panels or stretched fabric can be used to cover the ceiling, offering a soft and tactile feel. This budget-friendly option allows you to experiment with different patterns and colors without a major commitment.
Embrace creativity by mixing and matching wallpaper or fabric with other design elements in your RV. Consider using accent colors that complement your furniture or curtains.
This cost-effective and lightweight solution allows you to express your style and create a cozy, personalized space inside your RV, making it feel like home wherever your travels take you.
Decorative Wallpaper Ceiling
Enhance your living space with a decorative wallpaper ceiling for an instant style upgrade. Lightweight and easy to install, decorative wallpaper adds flair and personality to any room.
Choose from a variety of patterns, colors, and textures to create a customized look that suits your taste and complements your overall interior design.
Transform a plain or dull ceiling into a focal point by applying peel-and-stick wallpaper. This user-friendly option allows for a hassle-free installation process and provides the flexibility to change the design whenever you desire.
Whether you prefer subtle elegance or bold statements, a decorative wallpaper ceiling is a cost-effective and visually appealing solution to elevate the aesthetic of your home.
Enjoy the transformation and the added charm that a well-designed ceiling brings to your living space.
Unique and Fun Wallpapered RV Ceiling
Infuse your RV with personality by opting for a unique and fun wallpapered ceiling. Transform the overhead space into a vibrant and eye-catching element of your mobile home.
Lightweight and easy to apply, wallpaper allows you to experiment with whimsical patterns, bold colors, or even playful designs that reflect your individual style.
This creative touch turns your RV’s interior into a lively and personalized haven, making your travels a delightful adventure surrounded by a unique and fun atmosphere.
Fabric RV Ceiling DIY
Elevate your RV’s interior with a cozy and cost-effective DIY by using fabric for the ceiling. Lightweight and versatile, fabric panels or stretched fabric offer a soft and tactile feel, creating a warm and inviting atmosphere inside your mobile home.
Begin by selecting a fabric that suits your style, whether it’s a subtle neutral or a vibrant pattern. Install the fabric by adhering it directly to the ceiling or creating removable panels for easy customization.
This simple DIY project allows you to experiment with different textures and colors to achieve the desired look.
The fabric not only adds a decorative touch but also contributes to sound absorption, enhancing the overall comfort of your RV.
Enjoy a personalized and charming space as you hit the road, turning your RV into a homey haven with a fabric-covered ceiling.
Painted Camper Ceilings
Transform your camper’s interior with a fresh and vibrant look by painting the ceilings. Painting camper ceilings is a simple and budget-friendly DIY project that can breathe new life into your mobile home.
Choose light and neutral colors to create an open and spacious feel, or go bold with vibrant hues for a more energetic atmosphere.
Before painting, ensure the ceiling surface is clean and well-prepared. Use painter’s tape to protect walls and fixtures, then apply a primer to ensure the paint adheres properly.
Once the primer is dry, paint the ceilings with your chosen color using a roller or brush. This easy and effective update instantly adds a personalized touch to your camper’s interior.
Consider adding decorative elements like stencils or patterns for a unique and playful vibe. The painted ceiling becomes a focal point, creating a visually interesting space.
With a little creativity and effort, painting camper ceilings is a rewarding project that allows you to express your style and make your mobile home feel like a cozy and customized haven on wheels.
Painted Ceiling in RV
Transform the atmosphere inside your RV with a painted ceiling, a simple and effective way to add personality and style.
Choose a color that complements your overall design scheme and opt for lighter shades to create a sense of openness. Before painting, prepare the ceiling surface by cleaning and priming it for better adhesion.
Once dry, apply the paint using a roller or brush, instantly refreshing and customizing your RV’s interior.
This budget-friendly DIY project allows you to make a big impact with minimal effort, turning your mobile home into a personalized and inviting space on the road.
Clean & Classic Painted Camper Ceiling
Give your camper a clean and classic makeover by opting for a painted ceiling or exterior. Choose a timeless and neutral color palette like whites, creams, or soft grays for a fresh and elegant look.
Before painting, ensure the ceiling or exterior surface is clean and well-prepared by smoothing out any imperfections. Use painter’s tape to protect walls and fixtures, then apply high-quality paint for a smooth and durable finish.
A clean and classic painted camper ceiling or exterior creates a bright and open atmosphere, making the interior feel more spacious. Consider paint a camper exterior for an overall transformation that enhances both the inside and outside of your camper.
This budget-friendly DIY project is straightforward, and the impact is significant. Enjoy the simplicity and sophistication of a clean, painted ceiling, turning your camper into a timeless and welcoming space for your travels.
Frequently Asked Questions
Why consider updating your RV ceiling?
To personalize and enhance the overall look and feel of your camper.
Can I use fabric to update my RV ceiling?
Yes, fabric is a popular choice for adding texture and style.
Are there budget-friendly options for RV ceiling updates?
Using affordable materials like peel-and-stick wallpaper or paint can make a big impact.
Can I paint my RV ceiling with a bold color?
Yes, painting is a versatile option to add vibrancy and personality to the space.
What is a shiplap ceiling, and is it suitable for RVs?
Shiplap is a type of wooden board; that can be used in RVs for a rustic and charming look.
Are there online resources for more RV ceiling ideas?
Yes, numerous websites and forums provide inspiration and step-by-step guides for DIY RV ceiling updates.
Final Thoughts
Exploring the realm of DIY RV ceiling ideas opens up a world of possibilities for updating and personalizing your camper space.
The 15 ideas presented here offer a range of options, from lightweight materials like PVC and foam to the natural warmth of wood and the simplicity of painted ceilings.
Each idea allows you to express your creativity and enhance your RV’s interior without breaking the bank.
Whether you choose to embrace the rustic charm of cedar wood planks, the convenience of peel-and-stick wallpaper, or the classic appeal of a painted ceiling, these DIY options empower you to make your camper a true home on wheels.
From practical considerations like lightweight materials to the aesthetic freedom of colors and textures, these ideas cater to various tastes and preferences.
Take on these DIY projects with confidence, knowing that you can turn your RV into a personalized and stylish haven, making your travel experiences even more enjoyable and comfortable.

Jackson Ray, a seasoned blogger with a decade of experience, is the creative mind behind “camperthingsplace.com.” Explore his wealth of insights and passion for camping through engaging content on the website.